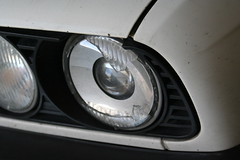
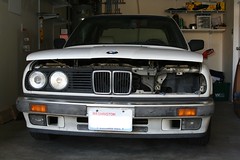
One morning last summer I left the house and set off for work, only to discover that the left-side low-beam headlight of my beloved BMW had been smashed to bits during the night. At first I thought that some parallel-parking-challenged idiot with a high-set bumper has backed up accidentally straight into my headlight and left the scene. But there was no other damage to the front, which would have been consistent with such an incident. Upon taking a closer look it became apparent that the shards that were spread over the bumper and on the ground in front of the car weren’t only those of my lens – indeed they were mixed with pieces of a shattered bottle of beer. It all became clear in an instant: public drunkenness, vandalism under the cover of the night, let’s do something dangerous and feel invincible and then, well, uh... run. I could see the bottle label clinging to a pattern of broken glass – “Miller High Life – The Champagne of Beers”. The anger and cursing stopped for a moment as I thought out loud: what kind of douchebag drinks “The Champagne of Beers” anyway?
Only the exterior lens had been destroyed, the interior one was still intact, so I left it alone for the moment. For better or worse it worked, even if the light wasn’t diffused properly. But who likes to drive a car with gouged eye forever? It took me a few months and a couple of more important projects until I finally got to this one.
A new low-beam ellipsoid lens assembly runs for about $140, which I wasn’t willing to pay. A used headlight, complete with casing and both low- and high-beam lenses, goes for $150 on some web sites. With enough patience I found a guy who runs a junk yard on eBay, who was selling one full used headlight for $90. I offered him $75 and he accepted. I could have probably done better with more patience but the price was good enough.
Here’s how I replaced the broken headlight. The Flickr photo set is arranged in chronological order. Click on pictures to see photo annotations indicating the location of various components.
Pop the hood open and remove the three retaining clips that hold the top part of the front grille.
Remove the two retaining screws on the bottom side of the grille, left and right.
Remove the grille and then the three large screws that hold the headlight casing in place.
Release the electrical connectors from the low- and high-beam light bulbs. Remove the headlight casing.
At this point I noticed that the adjustment screws were located in different positions on the two casings. All photos of headlight assemblies that I was able to find online looked like my old one. The one that I had just purchased had the vertical adjustment screws in locations where the old casing had fixed, non-adjustable retaining screws. By all means of logic, the old casing seemed to have all its limbs in the right places and the new one was an aberration. How did the screws switch positions? Bad German assembly-line robot? Incompetent American mechanic? We’ll never know...
Being a stickler for correctness I decided to remove the lens assemblies from the new casing and install them on the old one. It seemed a better solution than the alternative of removing the new lenses, moving and adjusting the screws and re-installing the lenses. Besides, one the screws of the old casing seemed in better shape than the “new” ones, which were rusty and bent. I also decided to replace my old high-beam, which was chipped at the bottom.
To remove the lens assembly from the casing the Bentley manual says: “Using a hot air blower, heat the lens-assembly retaining clips, then pull out the light assembly.” Having already tried that when I replaced the light bulb last summer I know by now that this statement is total bull. The heat from the blower is supposed to loosen the plastic clip that fits tightly on the tip of the retaining screw, which is shaped like a bulb. I tried that with a hair dryer and besides burning my fingers I wasn’t able to make any difference – maybe if I had had 100 additional Watts I would have fared better. In the end I had to apply massive (but gentle!) force, pulling the lens away from the casing. It’s not a trivial task when there isn’t enough room to stick both hands in the opening and pry the parts apart, and you can only use the tips of your fingers – all the while worrying about breaking the lens assembly tabs, which are just plastic after all.
A lot of cursing and name-calling certainly helped.
Installing the new lens assemblies on the old casing was much easier than removing had been. A couple of the retaining clips had broken in the process, but between the old and the new lenses I had enough replacements.
I sure hope I don’t have to do this again any time soon. Stay away from my car. And if you drink that Champagne of Beers piss, stay away from me as well. All those who drink Miller High Life are douchebags. There are no exceptions.


