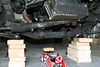
The oil pan has been leaking for a long time, leaving clusters of dark spots on my garage floor. Sooner or later I had to replace the oil pan gasket, so I bought a new one. That was a year ago. In the meanwhile I read about the procedure on books, web sites and forums. The more I read, the more I realized this was going to be a tough job. The oil pan on the M20 engine is difficult to remove without doing a lot of additional work like removing the subframe or raising the engine. Because of limited clearance you may need to drop the oil pump in the pan before being able to remove the pan; then you would have to mount it back on with the pan around it. Not an encouraging prospect. Finally the opportunity presented itself to take on a bold goal: I had decided to replace the front subframe as well because one of the tabs that the stabilizer bar attaches to was broken, causing a very annoying rattle when the stabilizer bar banged against the subframe.
I didn’t have to buy a new subframe for this, but at that moment I felt that instead of looking for someone who could weld a new custom tab to it, I would rather buy a new one. I found a new subframe on eBay, sold by a family dealership that was trying to get rid of some stock parts for past models and negotiated it to $350. By comparison Bavarian Auto sells one for $541.95. A waste of money anyway, you will say. Yes, disposable income leads to unjustified expenses.
The decision was easier now: I had a justification to remove the subframe so I didn’t have to remove the oil pan the hard way. In the process I would not only fix the leak, but also stop the stabilizer bar rattle. To remove the subframe I had to support the engine from above, so I bought an engine support bar from Harbor Freight for $50. I decided to replace the oil pump as well. I haven’t heard reports of oil pumps breaking, but this was an opportunity to make sure everything in the oil pan was new. I certainly wasn’t going to enjoy repeating this procedure if the pump ever needed replacement.
Click here for the full set of pictures. Click on thumbnails for a bigger version, with notes that indicate the location of various components.
Preparation (Day 1, Wednesday)
As usual, start with raising the front and removing the front wheels.
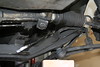
Remove the 17mm bolts that secure the control arm “lollipop” bracket to the body.
Remove the 13mm bolts and release the brackets that hold the stabilizer bar to the subframe (the bar will now be resting on the control arms). I only had one of those left, on the passenger’s side. The one on the driver’s side was missing.
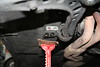
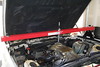
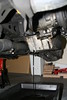
Install engine support bar above engine; hook it to support loop bracket.
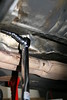
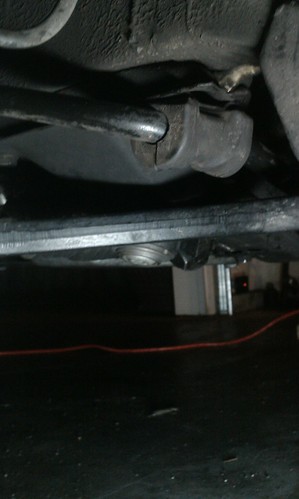
Remove the oil protective plate for better visibility under the engine and access to the oil pan. The plate is held by some metal screws and plastic fasteners.
Remove oil drain plug and drain oil overnight. Remove oil filter. In fact I should have drained the oil before raising the car, because some oil collected at the rear end of the pan and came out pouring on the floor when I removed the pan later.
Remove the front subframe (Day 2, Thursday)
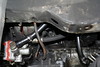
Detach the steering rack from subframe by removing the two 15mm bolts. You will need replacement self-locking nuts. Move the steering rack out of the way.
Remove the 17mm nuts that hold the motor mounts to subframe. Lift the engine just enough to make sure it’s securely attached to the support bar.
To prevent accidents, support the subframe with a jack before detaching it. Then remove the 4 17mm retaining bolts and lower the jack. You may need to hit the subframe with a hammer or mallet if it’s stuck to the chassis.
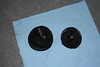
When I removed the subframe, the driver’s side motor mount fell, which it wasn’t supposed to happen. I realized that the rubber part had separated from the upper metal plate, which meant that the engine was just resting on the mount, susceptible to vibrations and shifts in position. This would not be enough to get the engine to fall off the mount, but enough to cause unpleasant vibrations and clunking. Unfortunately I had not planned to replace the mounts so I had to order them and wait over the weekend.
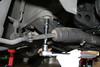
Support control arms after dropping the subframe, so the strut mounts and tie rods won’t have to bear all the weight.
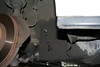
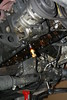
Remove the 22mm nuts that hold the control arm ball joints to the subframe. This is difficult to do with the subframe in place because the space is very limited. Removing the nut was much easier after the subframe was dropped. Take the subframe out of the way – I had to hit the ball joint bolts with a hammer to get them unstuck; be careful not to damage the threads.
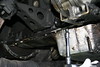
Remove the oil pan (Day 3, Friday)
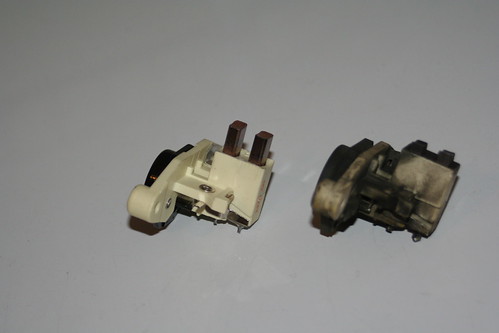
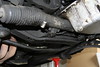
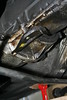
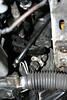
Disconnect oil level sensor connector (at the base of the alternator), remove dip stick. Remove the ground wire attached to the oil pan (I should have done this when I removed the sensor but I missed it; it was much harder to remove from the detached pan)
Remove 4 hex-head bolts (13mm) and the 5 Torx bolts (one E14, the others E12) that secure the bellhousing plate cover; remove the cover. Bentley says there are 4 Torx bolts; in reality there are 5 on mine, the leftmost bolt was very hard to remove. Make a note of the positions of the various bolts – they have different lengths.
Remove the 25 10mm retaining bolts that hold the oil pan to the engine block. There should be enough clearance now, with the subframe removed, to move the oil pan out of the way before dropping the pump. Oil will flow!
Remove the three mounting bolts and drop the oil pump - more oil will flow.
Scrape off the rest of the gasket and clean mating surfaces.
Install oil pan (Day 4, Saturday)
Install new oil pump, torque bolts to spec. (all torque values taken from the Bentley)
Install new gasket (I had a cork gasket), and place oil pan in position. This was a delicate operation. Once the pan fits you have to keep it in place with one hand while screwing in a few of the bolts with the other hand and make sure the whole thing does not shift. I used “Gasgacinch”, a sealant which I bought from O’reilly, on both mating surfaces. I had to shift the pan slightly once as some of the bolts wouldn’t fit, but fortunately it didn’t seem to drag the gasket too much around. There’s only one place where the gasket comes out about 1 mm.
Install all bolts in a star pattern, torque to 8 ft.lb. I think I may have applied more torque than necessary.
Install the bell-housing cover (no torque specified)
Re-attach ground wire and connect oil sensor connector.
Install oil drain plug and washer. Install new oil filter, put dipstick in
Fill engine with oil.
Install subframe (Day 5, Tuesday)
I had to wait a couple of days for the new motor mounts to arrive.
Fit control arm center ball-joint bolts through the corresponding socket holes in the subframe; torque new self-locking nuts to spec. Keep control arms supported on wood blocks. I had to raise the subframe and prop it against the body, and then I pressed the ball joint from below with a jack because the ball joint on the right side was spinning around its axis when I tried to tighten the nut.
To be able to unlock the nut that secures the mount at the top to the engine support bracket I had to remove the brackets altogether. There was no easy way to get to that nut and wield a wrench in the limited space, especially on the passenger’s side where the charcoal canister hangs ½ inch above the nut. this could be avoided by removing the heat shield on the passenger's side and the charcoal canister on the driver's side.
Remove the nuts and drop the mounts, or whatever's left of them - in my case the driver’s side mount was broken; the top plate had detached from the rubber part. Re-attach motor mounts brackets to the engine block.
Attach the new mounts to the engine brackets, and tighten the top nut loosely.
Raise subframe using a jack until it fits in position, the bolt guides match the bolt holes in the body, and the motor mounts and hood catch brackets fit the subframe's notches. I thought I needed a helper to wiggle the engine back and forth to fit the mounts, but this ended up being delicate incremental work: crank the jack one step, shove the subframe a bit, turn mounts to get them closer to the notches, push engine a tad to the left, repeat. Make sure you push the steering rack back in its location as you raise the subframe.
Bolt subframe on the body. No torque specified in the Bentley. Lower the engine completely; Remove engine support bar.
Tighten the motor mounts nuts, top and down. The top ones are difficult. I tightened them by hand as far as I could, then I used a 17mm short wrench to get them tight. No chance to tighten them to spec.
Attach steering rack to subframe, use new self-locking nuts.
Attach stabilizer bar to subframe. It wasn’t easy to attach the new bracket that had been missing before. I had to detach the link that connected it to the control arm first.
Bolt lollipops back on to chassis.
Wheels. Done.
The net effect: no leak so far, no oil drops on the garage floor.
Before replacing the broken motor mount I used to feel a strong vibration propagated through the steering column to the steering wheel at around 55-60mph. Changing the broken mount made this vibration go away.
Time
As you can see from the outline of this article I took my time. I was on vacation; I would wake up late, work for a few hours, then I'd take a break for the rest of the day. If I hadn't had to wait for the motor mounts to arrive the whole procedure would have taken less time. I believe you should be able to do this in one weekend, if you have all the parts and tools ready and you wake up early. It's hard work though; my back and hands would hurt after a few hours of constantly getting under the car and out again, and ratcheting with my hands in the air while lying down.
Cost
Not including various shipping charges
- Subframe: $350
- Motor mounts: 2x$52 = $104
- Oil pan gasket: $8
- Oil pump: $143.25
- Various self-locking nuts: $10, maybe
- Gasket sealant: $5
- Engine support bar: $50
- Small tools that I didn't already own: $15
Click here to read more...
Summary only...